Learning to Work With Bread
 First, let me say that I am a student of good bread, not a master. I have been trying different recipes for years, and I can honestly say I have managed to learn a little from all of my experiments.
I would like to clarify one thing: I am lazy. I don’t mind kneading a bread like a mad-man from time to time. I even find it somewhat therapeutic. But the reality is that if I have to work like a slave to make a loaf of bread regularly, most of the time I will opt-out of it. So what I really needed was a way to make great bread the easy way.
If you forgive me this sin, we may continue.
I am a loaner in that I don’t like to live in populated places. I prefer a place in the country to a city apartment. Consequently, I have often lived in remote places like South Pomfret, Vermont at the end of a six mile logging road. Even here in Switzerland, I live in the tiny village of Sulz in Canton Aargau, where whenever anyone comes to visit us the first question is “what made you decide to live here”? That’s ok, I don’t mind. It’s just the way Melanie and I are. But the down-side of living in remote places is that we don’t have access to many of the conveniences you city-mice have. One of which is really good bread. Hundreds of times I have tried to recreate bread like you get from a wood-fired European oven, but the results were often so pathetic that I hesitate to admit them to you.
All of that has recently changed. A combination of events beginning with Alberto’s now famous pizza dough have allowed me to create a bread that I am proud to put my name on. In fact, today I was in France and I felt like Paul Bocuse at McDonalds. I inflated my chest and smiled as I walked by the anemic breads on the racks at Rond Point and Géant. “I have them beat” I thought to myself. I have mastered bread! “I am the bread man! Coo coo ca chu!!!”
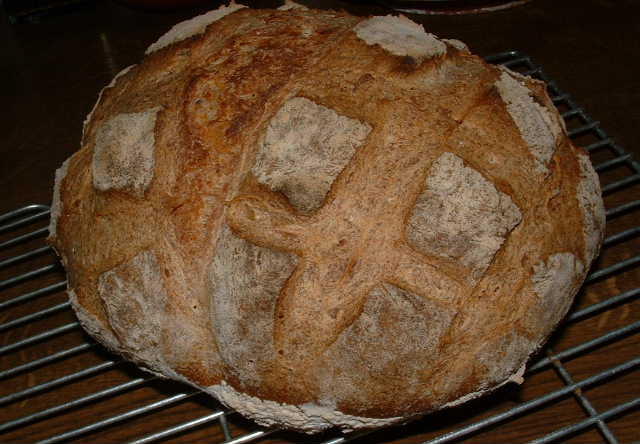
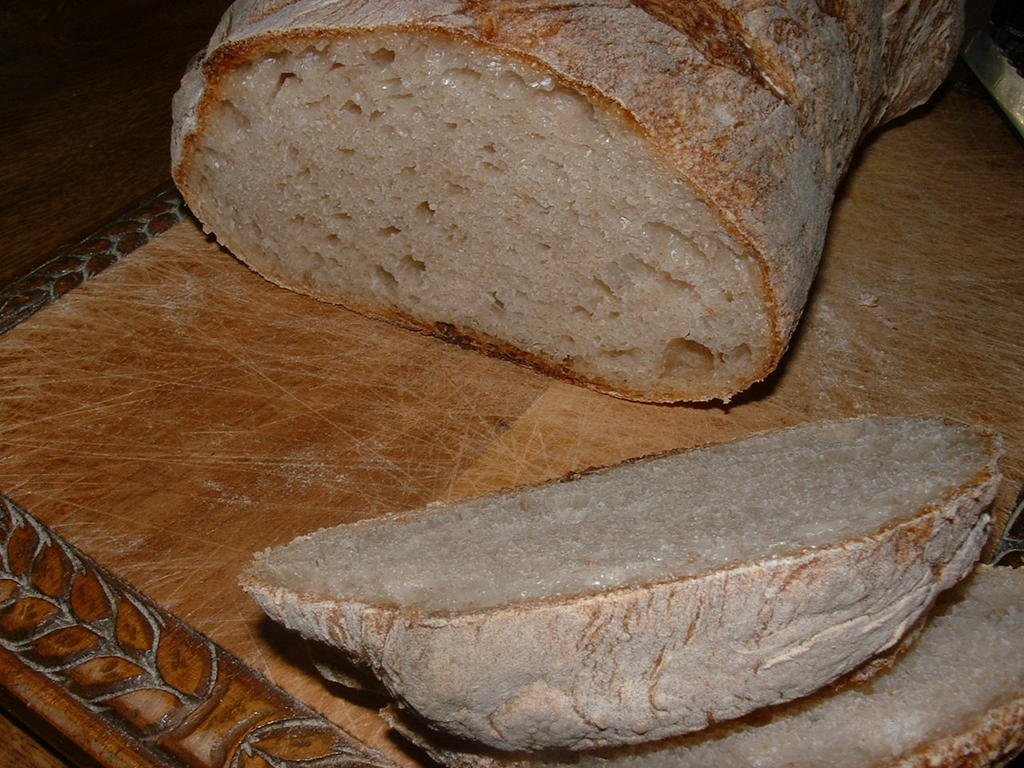
Yep, I’m happy! I finally understand how to make great bread. Not good bread…GREAT BREAD! Beautiful, moist, chewy, dense bread with a perfect crust that has a brown patina that looks like flour-dusted, aged leather. Old-world European bread! Bread you rip apart like soft leather. Bread you can just sit down and eat and say “to hell with the rest of the meal”!
What’s my secret? ……I can’t tell you. Really I can’t! Because there isn’t one. I make it by “feel”. I can “feel” when I need to add more flour, water and salt, but I honestly can’t tell you exactly how much I put in. But there are a few techniques that once performed can lead to the bread I just described. There really isn’t a single recipe and I don’t think there ever will be for me. You see the recipe would have to change with each different kind of flour, and there are so many different flours that it would be impossible to say: x grams of flour, x grams of water, and x grams of salt and guarantee a perfect recipe. Too many variables!
With that in mind here is a close idea of what I put in my bread but remember you will probably need to change it to make "your" bread.
To make the batter:
500 grams of flour
500 ml warm water
1/8 teaspoon of active dry yeast
To finish the dough:
10 grams of salt (1 heaping teaspoon)
additional 200 grams of flour
I will try to explain the process I use as best as I can with the understanding that the really important ingredient you have to add is patience. Only you will know when it’s really “right” and that will only come with time.
Before we talk about the dough, let’s discuss machinery. I have heard bread can be made entirely by hand but as I mentioned above…I am lazy so I use a mixer. I strongly suggest a Kitchenaid mixer. In fact my whole recipe is based on a Kitchenaid mixer because that is what I have. Why is a Kitchenaid so special? Because it has a paddle and a dough hook. The paddle is vital for mixing the dough. We mix the dough in two stages. First in the wet stage with the paddle to get the glutens working then in the dryer stage with the dough hook to knead the dough.
First we need flour. This is the single most important ingredient. Buy the best flour you can get your hands on. Buy it mail-order if you have to, but get good flour. I suggest staying away from all purpose grocery store flour. Try to find bread flour. You can make your own mix if you like, 20% whole wheat and 80 white bread flour is good. You have to “feel” this for yourself. Do you like whole wheat best? Do you like rye? Pick one and don’t worry you can always switch to another flour in the next session.
Now you have a flour picked out. Let’s move to yeast. I use ADY (active dry yeast) you can use fresh yeast, but the truth is there is little difference and ADY is much more convenient and economical. Almost all bread recipes call for way too much yeast. Easy does it.
Ok, let's start, put the lukewarm water in the bowl of your mixer and add the yeast. Attach the paddle and run it on low for a while so the yeast can dissolve. Now, with the machine still on low, start adding the flour one spoonful at a time. Maintain a balance of water and flour so that you have a thick paste. Thick enough so that you hear the machine slow down from th
 e burden of mixing the dough, but if it starts to ball up it is too dry, so add some water. What you are aiming for is a very thick batter that sticks to the sides of the bowl. When you achieve this let the machine do all the work. It needs to beat this wet batter for about 5 minutes. As it beats you will notice the batter gets “stringy“. This is a very good thing. This means the glutens are waking up and the dough is heading in the right direction. After a minimum of five or six minutes (I have beaten the batter for up to 20 minutes) add 1 teaspoon of salt and mix it in well.
  Now stop your machine and remove the paddle. Attach the dough hook and turn it back on low. Slowly, one spoonful at time, add the rest of the flour until the dough forms into a nice ball and incorporates all the dough from the sides of the bowl. At this point let the machine knead the ball for another 25 minutes.
 After the final kneading stop the mixer, remove the dough hook. At this stage the dough is pretty loose. It will hold its form for a while but but give it a minute and it will spread out like a very thick batter.
Cover the bowl with plastic wrap and let it sit on the counter for 12 hours depending on the temperature of your kitchen. The dough will take its time, but after 11-12 hours it should it should be about four to five times as large as it was when you stopped kneading it (if not, your yeast might have been bad).
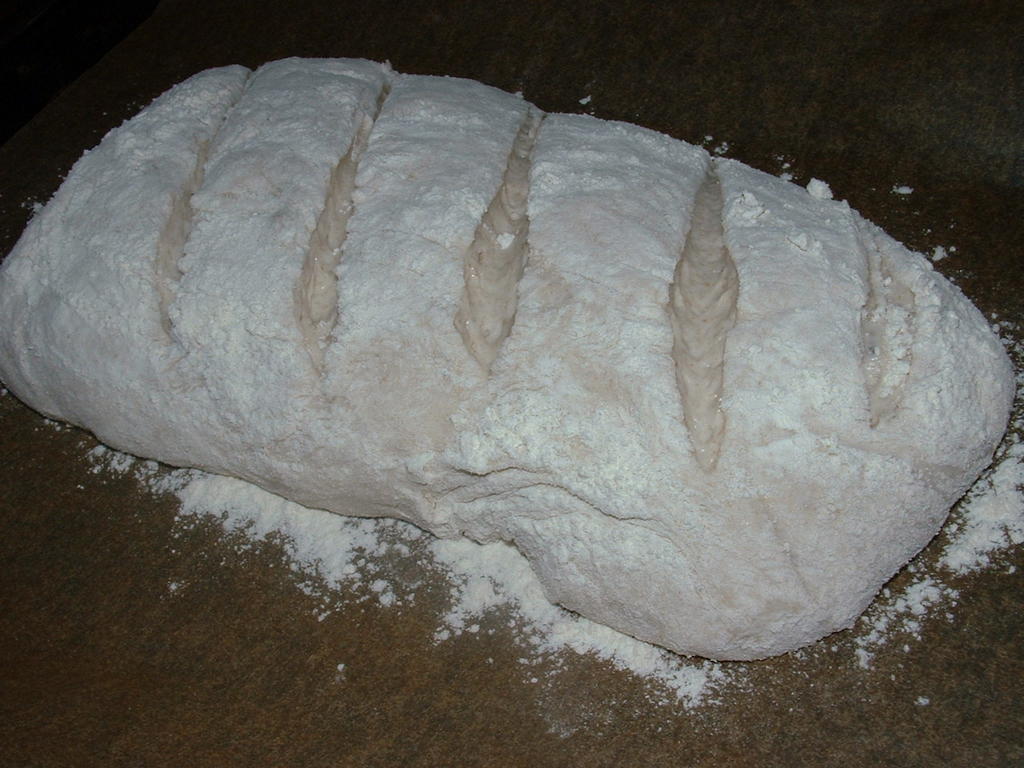 After the rising time you are ready to bake the bread. Prepare a cookie sheet with piece of parchment paper and set to one side. Dust the counter with a heavy coating of flour and with a rubber spatula slowly and gently coax the dough out of the bowl and onto the floured counter top. Without kneading, lightly form the dough into an oval or ball by gently tucking the sides underneath. Transfer it onto the parchment paper, dust it with flour and make a few slashes on the top with a razor blade.
 Put the bread into a 400 degree Fahrenheit or about 200 Celsius oven. Bake for 30-40 minutes, then turn up the heat to get the crust a little browner if necessary. Remove from the oven and let cool completely before cutting.
 You will end up with a bread that is thick, chewy, moist and when you press down on it, it springs right back up to its original form.
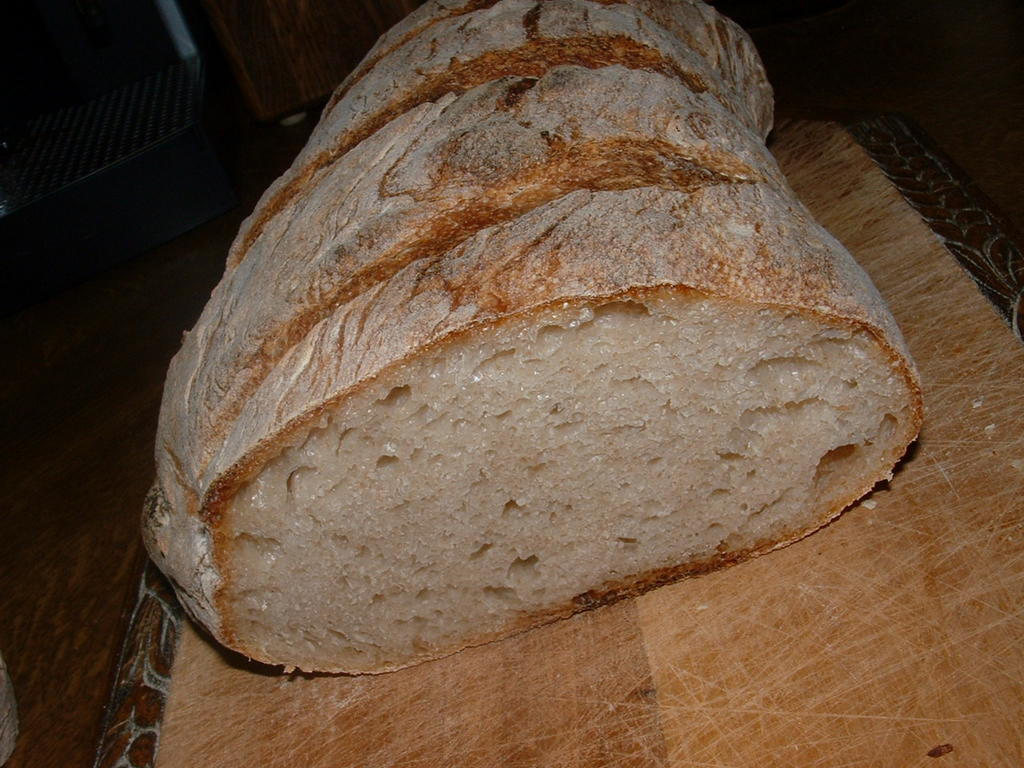
Well that’s all there is to it. The most important things I have explained in detail the rest is something you have to adapt to the flour you use, your kitchen equipment, and your own personal tastes.
I hope you will experiment and that you will enjoy making your own bread as much as I do!
posted by Edorovio at Friday, August 26, 2005
![]()
![]()


0 Comments:
Post a Comment
<< Home